There are many methods of propagation. Plants produced in a nursery, whatever its size, are generally of better quality. Experienced small farmers often just split their existing hedgerows, using the downhill part of the hedge as transplants for new hedgerows; this works for small numbers under proper management. Large numbers of quality, uniform slips should come from nurseries.
The cheapest, and in most cases the best, is production of bare-root planting material. In Thailand vetiver was successfully propagated by the millions in vitro, but even these plants have to go through a nursery phase. Containerized plants are very good but more expensive, and are recommended where site conditions warrant them. Other propagation methods are described in Document Center papers.
The photos below show, step by step, how bare-root vetiver slips are produced. We thank Evan Millwood of Queensland, Australia for many of them.
Photo 1. An experienced vetiver user teaching new users about the basic planting unit (slip) and how to plant and use it.Photo 2. Original vetiver mother plant (C. zizanioides), 4 years old; the shovel is for scale. This is what many new propagation units start with.Photo 3. A newly planted commercial nursery. (Graham Dabbs – Zimbabwe)Photo 4. A well-managed nursery. Plants are irrigated and trimmed regularly to encourage tillering. Planting distances vary, but aim for a density of 60,000 plants/ha. (P.K. Yoon – Malaysia)Photo 5. Most nurseries are small and simple, like this one producing containerized plants. Properly grown, their plants are just as good as those from large commercial growers. (Thein Maw – Myanmar)
2. Harvesting the clumps
Photo 6. Harvesting (digging clumps): first trim the plants to make digging easier. (Ian Millwood – Australia)Photo 7. Dig the trimmed clump. (Ian Millwood – Australia)Photo 8. Cut the soil away from the clump sides, leaving 5 cm of root below the crown. (Ian Millwood – Australia)
3. Dividing and trimming the slips
Photo 9. Divide the group of tillers (slips) in your hand further, into groups of at least three tillers: the basic transplanting unit. (Ian Millwood – Australia)Photo 10. Ready for final trimming and division into three-tiller planting slips. Dead tillers MUST be discarded. (Ian Millwood – Australia)Photo 11. Trimming roots and leaves of slips with a machete. (On the Mekong, Cambodia)Photo 12. Trimming transplants with pruning shears. (Ian Millwood – Australia)Photo 13. Transplant units ready for final trimming before shipping or planting. (Ian Millwood – Australia)Photo 14. Final transplant unit, cleaned by removing any dead material. (Ian Millwood – Australia)Photo 15. Cleaned transplant units from a single mature clump, ready for use or shipping. (Ian Millwood – Australia)
4. Bundling, storing and shipping
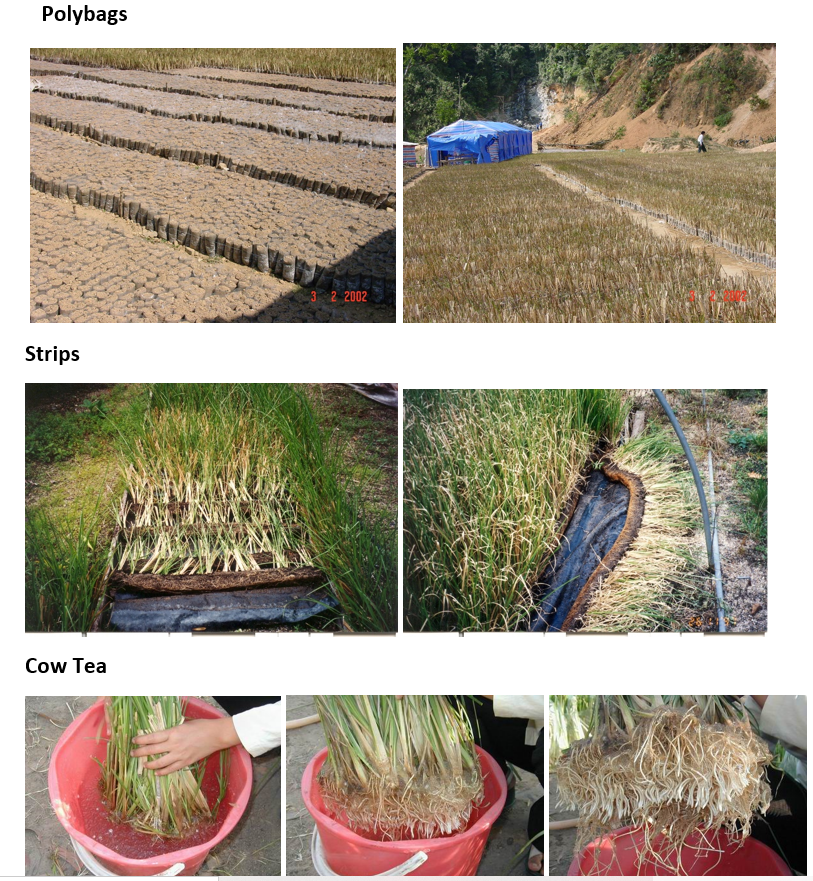
Photo 16. Bundling the slips for transport. (Roley Noffke – Madagascar)Photo 17. Transport: slips trimmed and bundled.Photo 18. Bare-root slips from a small nursery, stored and kept damp under shade, ready for bulk shipment. (Thein Maw – Myanmar)Photo 19. Some other propagation methods.
Bare-root plants can survive shipping for up to a month if correctly packaged and handled. Next step: How to Plant and Maintain.